The Ultimate Guide to Printing & Coloring: How to Get Perfect Pages Every Time
Let’s be honest: there is nothing worse than clicking print, handing a fresh coloring sheet to your little artist, and finding out five minutes later that their favorite washable markers have bled straight through the paper, leaving permanent stains on your clean kitchen table. Or worse, the lines came out so blurry and faint that it looks like a smudge rather than their favorite cartoon character.
At coloring.photos, we don’t just host thousands of free printable pages; we actually print and test them ourselves.
Whether you are a parent trying to survive a rainy Sunday afternoon, a teacher prepping classroom packets, or an adult hobbyist winding down after a long day, this comprehensive guide will help you master paper weights, optimize your printer settings to save ink, and match the right coloring tools to your physical pages.
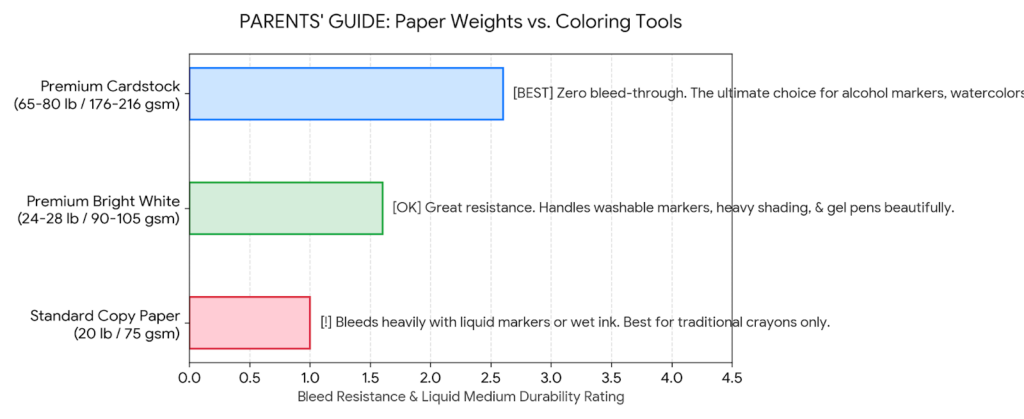
1. Understanding Paper Weights: Stop the Bleed-Through
Standard printer paper isn’t one-size-fits-all. When you buy a ream of paper at the store, the weight determines how much liquid ink or heavy crayon pressure it can handle before buckling or tearing.
Here is our real-world breakdown of how different paper types handle kids’ coloring tools:
| Paper Type & Weight | Best For | Compatibility with Coloring Tools |
| Standard Copy Paper (20 lb / 75 gsm) | Quick classroom packets, mass printing, simple crayon coloring. | Good for: Standard wax crayons and colored pencils. ⚠️ Warning: Liquid markers or watercolors will bleed through and warp the page instantly. |
| Premium Bright White (24 lb – 28 lb / 90 – 105 gsm) | Detailed cartoon characters, everyday home printing. | Good for: Washable markers, gel pens, and heavy crayon shading. ✨ Our top pick for balanced everyday home printing. |
| Cardstock (65 lb – 80 lb / 176 – 216 gsm) | Crafts, DIY puppets, heavy marker blending, multi-layered art. | Good for: Alcohol markers (Ohuhu/Copic), glitter glue, light watercolors. 👍 Feeds easily through 99% of standard home printer trays. |
💡 Parent Hack: If you are using standard 20 lb copy paper because it’s what you have on hand, place a cheap plastic placemat or a piece of scrap cardboard underneath the page before your child starts coloring with markers. This keeps your tables safe from ink ghosting!
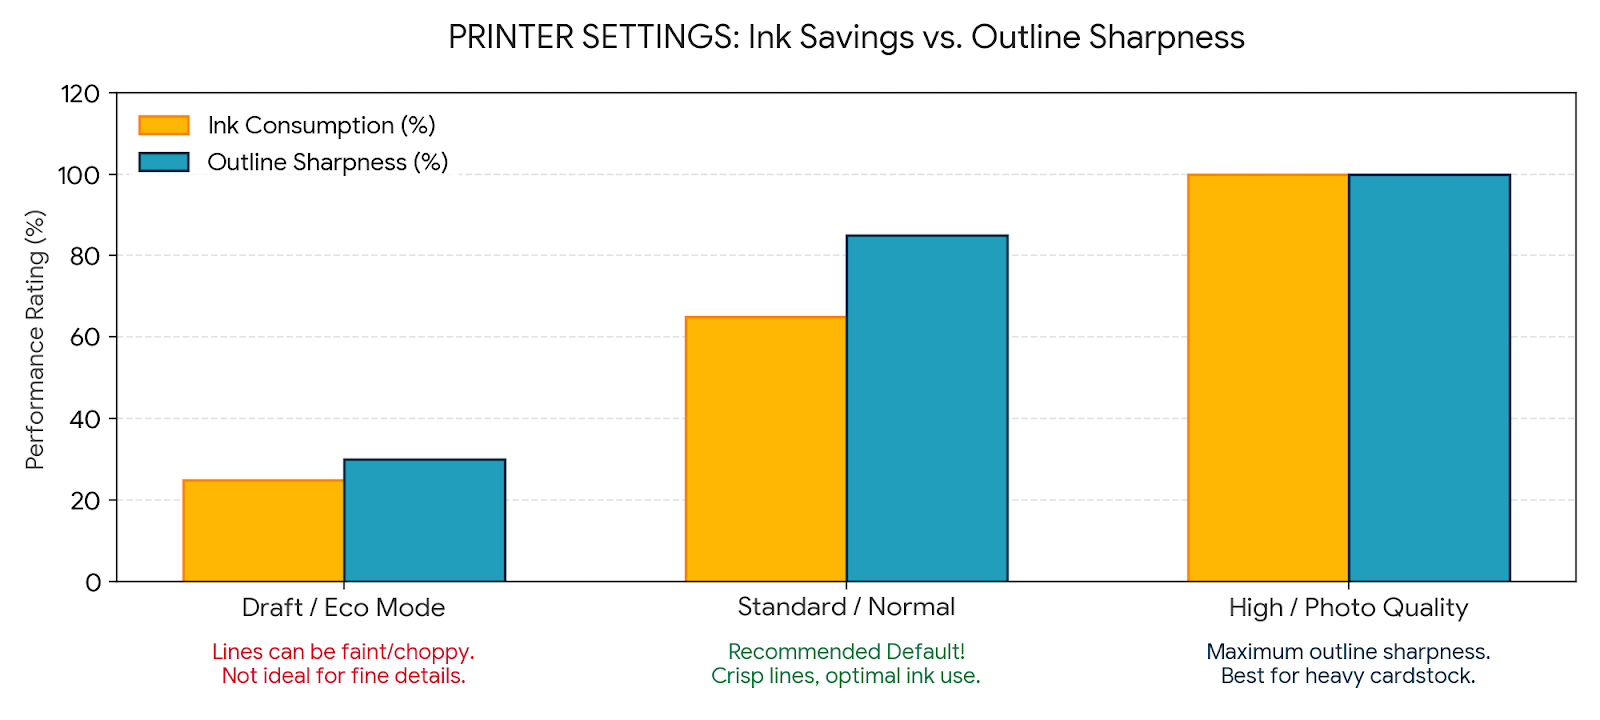
2. Printer Settings Mastered: How to Save Ink & Keep Crisp Outlines
You do not need to burn through expensive ink cartridges to get beautiful coloring pages. By tweaking your printer properties before clicking “Print,” you can dramatically extend the life of your ink tanks.
Choose the Right Quality Profile
- Draft / Eco Mode (Not Recommended): While it saves the most ink, draft mode cuts down on the saturation of black lines. For intricate categories or mechanical drawings, lines will come out choppy or faint, making it frustrating for young children trying to follow borders.
- Standard / Normal Mode (The Sweet Spot): This is the ideal profile for 90% of our coloring sheets. It delivers perfectly solid, crisp black outlines without dumping excess wet ink onto the paper.
- High / Photo Quality (Best for Cardstock): Only use this if you are printing highly detailed grayscale designs or intricate patterns onto heavy cardstock. It ensures every microscopic line details sharp and crisp.
Inkjet vs. Laser Printers
- If you have an Inkjet printer: Let the page dry for about 30 seconds after printing, especially if your printer uses wet pigment inks. If kids jump in with juicy markers immediately, the wet ink lines might smudge into the colored areas.
- If you have a Laser printer: Your pages are ready to color the millisecond they drop into the tray! Because laser printers use heat to fuse dry toner dust to the paper, the lines are completely smudge-proof.
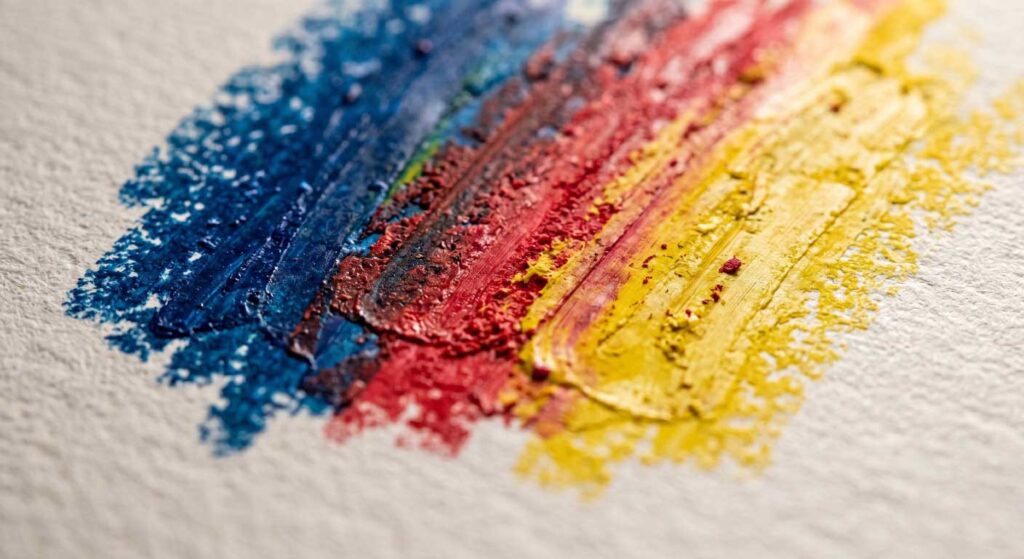
3. Matching Your Coloring Medium to the Page
Different coloring tools require different paper textures (known as “tooth”). Matching them correctly makes coloring physically smoother and more satisfying for little fingers.
Wax Crayons & Plastic Twistables
- Best on: Standard Copy Paper or Premium Bright White.
- Pro Tip: Traditional wax crayons perform best on paper with a slightly rough texture. If the paper is too glossy or slick, the wax won’t stick smoothly, leading to patchy color coverage.
Sharpened Colored Pencils
- Best on: Detailed drawings, geometric patterns, and shaded line art.
- Pro Tip: For older kids or adults practicing color blending, use a high-quality colored pencil with a soft wax core (like Prismacolor or Castle Arts). They apply rich color smoothly without needing heavy hand pressure, which prevents standard paper from tearing.
Washable & Alcohol Markers
- Best on: Heavy 24 lb+ paper or Cardstock.
- Pro Tip: Alcohol-based markers naturally spread and “bleed” slightly past where you press them. Teach your kids to color a tiny fraction of a millimeter inside the thick black lines; the ink will naturally expand right up to the border for a perfectly clean finish.
4. Turn Coloring Pages Into Interactive Craft Projects
Coloring doesn’t have to end when the page is fully colored! Here are three simple, low-prep ways our community transforms standard coloring sheets into physical toys:
- The Popsicle Puppet Theater: Once your child finishes coloring a character (like our popular Gabby’s Dollhouse sheets), help them use safety scissors to cut out the character along the thick outer lines. Tape a wooden popsicle stick or a paper straw to the back, and you have an instant, custom puppet for creative playtime!
- DIY Window Stained Glass: Print your favorite design on standard thin copy paper. Have your child color it entirely using vibrant markers. Once done, lightly wipe the back of the paper with a cotton ball dipped in a tiny amount of baby oil or vegetable oil. The paper will become semi-transparent! Tape it to a sunny window for a stunning “stained glass” effect.
- Custom Matching Memory Games: Print two copies of 4 or 5 different coloring pages at a reduced scale (choose “4 pages per sheet” in your printer settings layout). Color the matching pairs identically, glue them to a cereal box cardboard background, and cut them out into squares. Turn them upside down for a homemade memory match game!
Join the coloring.photos Art Gallery!
Did your child make something they are incredibly proud of? We want to see it!
Head over to the product page of the character you just printed, scroll down to the review section, and upload a quick photo of their finished masterpiece. Sharing their art builds immense creative confidence, and it helps other parents see exactly how these characters look when brought to life with color!
Have a printing question or a custom craft idea we missed? Drop a comment below or reach out via our About Page—happy coloring!